Showing posts with label Outdoors. Show all posts

Sunday, March 7, 2021

Shabby Chambray Tunic Upgrade: Smart Fashion Tricks for Modest Women on a Budget

 Upcycle an old tunic in 4 simple steps


I love being the recipient of donated clothing. It's a treasure trove of possibilities. I don't always get to wear the garments myself or use the fabric in my homemaking, but even if I end up giving them away to someone else, the exploration of potential is great fun. Very often, with a little creativity added, I do end up with something I love to wear.

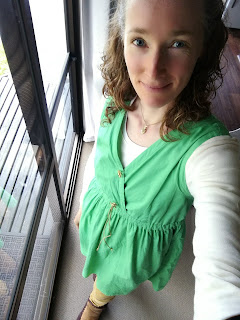
The original state of this chambray tunic didn't look impressive - stained, a bit faded, and with deep armholes edged with a bulky wad of folded self-fabric trim. I marvelled that a designer would choose to position a wad of fabric under a woman's armpit... Anyway, I saw Possibilities.

The washed-out blue is not a good colour on my Spring complexion that's naturally blue-toned already, but given the permanent stains, I figured I'd only be wearing it in the garden. And as soon as I touched that soft, light cotton, I knew I very much wanted to wear it in the garden and I knew I'd feel very comfortable when I did.

ESSENTIAL UPGRADES

The essential upgrades required for this to be achieved were as follows.

1. Remove those ugly arm bands and fit the side seams properly under my armpits.
2. Make bias binding to edge the armholes.
3. Use the rejected armhole fabric to create modesty-enhancing breast pockets.
4. Add a dome/press stud between gaping buttons.


FIT TO THE PITS

Removing the armhole bands and shifting the side seams closer to the body removed most of the problem of immodest gaping. Adding bias binding to the armhole edges added an exta centimeter coverage and helped pull in the soft edges to maintain a firm, close fit.


HOW TO MAKE BIAS TAPE FOR THIS PROJECT*

Cut 40mm wide strips of fabric across the bias (at 45 degrees to the selvedge). *Photo examples from another project

If your strips aren't long enough, cut the ends at 45 degrees and stitch together with a very narrow seam. Press seams open.

Press the strip in half, then press one side in towards the centre fold. Stitch the other side to the garment at 10mm seam allowance (right side of tape to wrong side of garment). Press the seam open. Turn garment right side out. Pin or tack the tape to the right side of the armhole, and topstitch close to the edge.

The cotton gingham I used for the bias tape is light and soft, so I didn't trim off any of the 10mm triple-fold tape after sewing it to the armhole, allowing the bulk of the seam allowance to create a firm edge.


CREATING FEATURE POCKETS

When I opened up the armhole fabric strips I'd carefully removed from the tunic, I found a fascinating combination of pleats and fade lines which I immediately knew I wanted to make a feature of the new version.

Throughout the process, I was careful not to press the pieces and lose those pleats. I sewed together the long edges of the two long strips, and from the length of this, cut two extra-wide pocket pieces, with the new seam running down the centre of each.

I cut a pocket lining (actual pocket width, plus seam allowance) from a matching cotton gingham, and interfaced it.

Photo from right to left: 1) old arm band pieces stitched together; 2) pleated chambray pinned to gingham lining; 3) chambray and lining stitched together and turned right side out. 4) Bias binding waiting above, one edge folded and pinned ready to be pressed (right), then (left) pins removed ready to sew the raw edge.


Right sides together, I pinned the chambray to the lining, pinching and folding the pleats and fade lines so they would show to advantage. (I didn’t tack them, which I regret, because one pleat switched direction under pressure from the sewing machine foot. Did you notice?)

I sewed around the edges of this pocket square, leaving a small gap in one side so I could turn it inside out.

I carefully pressed the seam edges of the pockets, still avoiding the centre pleats.

From left to right: 1) raw edge of bias binding ready to be sewed to the top edge of the pocket (right side to wrong side); 2) bias binding folded over to the right side and topstitched close to the edge.


I prepared bias binding from the gingham, and bound the top edge of the pockets. Now the pockets were ready to be topstitched to the tunic.


Voila! An old, stained tunic has a new lease of life, and I love wearing it. I had all the materials I needed in my stash. The only expense was in time and creativity.

Here endeth the tale of another satisfying and enjoyable Frugalista Fashion project. I hope you've found something beautiful and inspiring here today.

Look out for more Boutique Narelle posts detailing liberating modest fashion techniques.

Fiat lux!
Narelle 


Friday, August 7, 2020

Eleven Ways to Keep Your Legs Warm in Winter


How to Stop the Cold Air from Breezing Up Your Skirt


Let's talk about cold legs. Actually, no. If you suffer from cold legs, you don't need to know about cold legs. What you need is solutions. Let's talk about ways to keep your legs warm.
I made this dress for an inland valley region of New Zealand which can experience lows of 8°C during the day and -2°C at night. Typically we only heated a couple of rooms in the house. Wearing layers was key for comfort.

Long Hems, Warm Fabric, and Linings


This dress is made of medium denier cotton corduroy. The skirt is lined with premium cotton flannelette. The bodice is lined with smooth cotton gingham for that helpful slippery effect when pulling one garment over top of another. I added a hem extension of doubled cotton sateen, stitched to the lining, so the dress reached the top of my sheepskin slippers (Snugglefeet from Classic Sheepskins).

Wool, Multiple Pairs of Socks, and Leg Warmers


In that climate, I would wear a mid-calf length brushed knit chemise (BN design) underneath the dress, merino wool socks, and chunky knitted wool leg warmers bunched around my ankles.

When I moved two hours north to a Mediterranean seaside climate (lows of 11°C to 1°C, but typically 5° warmer than my hometown), the hem extension was excess to ankle warmth requirements, so I removed it, which also made my more active life easier.

A short, store-bought chemise is sufficient now, but I still wear merino socks, and the leg warmers if it's a very cold day.

I don't need the sheepskin slippers now (which is a relief, because the wool was wearing thin and the price had risen by NZ$100). A second pair of socks is sufficient indoors.
There are three places I typically wear this dress.

It's great on a beach excursion, for which I wear two pairs of socks inside my aerated crosstrainers, or rubber boots if I'm planning to get damp feet. The hem is weighty enough that I'm not worried about the wind blowing it up around my waist.

The same garb works for a visit to my neighbours in their unheated, uninsulated house, where I sit on the floor to play with their young children. The dress hem is full enough that it doesn't impede my movements. With my shoes off, I'm very grateful for the wool leg warmers.

The dress is a flexible style. I also wear it to meetings. It's easy to elevate it from casual to smart by changing the jacket and the footwear, and adding some pretty accessories.

Further Layering Tips

Five other ways to keep your legs warm

  • wool or thick denier nylon stockings
  • wool or cotton knit leggings (footless tights)
  • thermal leggings (long underwear)
  • wool or cotton knee-length socks
  • fleece track pants

Now you know eleven ways to keep your lower limbs more comfortable in winter.

Look out for more Boutique Narelle posts detailing liberating modest fashion techniques.

Fiat lux!
Narelle


Friday, June 5, 2020

Spit-Spot Waterproof Clothing for a Lady Cyclist


Practical Solutions for Active Women who want to be Modest and Stylish

When I moved to the city, a bicycle became my primary means of transport in all weathers.

Modesty Challenge


How to stay dry, covered, safe, and comfortable while cycling, taking into special consideration rain from above, splashing from below, and wind from any and all directions.

Functional Challenge


The bicycle that started me on my adventures was 22-year-old Plum, a step-through Town&Country mountain bike adapted for urban living. She did not have the safety features of chain guard and rear wheel cover that vintage ladies bikes are often equipped with, allowing modest ladies to cycle safely in long skirts.

I put great effort into finding a clothing or equipment adaption that would allow Plum to accomodate the long hems in my wardrobe, but I was unsuccessful. Even stovepipe jeans (worn under a tunic) were a hazard without ankle clips.

My everyday garb became knee-length dresses with ankle-hugging trousers underneath and an acceptance that, while riding, very often the dress would be rumpled up well above my knees.

That is, until I welcomed a new steed into the stable. Angel is a modern urban cruiser. She doesn't have a vintage chain guard and rear wheel cover, not even spray guards on her wheels, but the design is sufficiently protective to the rider that I can re-explore options in ladylike cycle wear.

My first experiment was with rainwear.

Action Challenge


It's raining.
I have to go out on the bike.
How can I stay dry?

Solutions


1) Parka in a Pkt by Denim & Co, a thrift-shop treasure found at SaveMart for NZ$10 -- light, portable, windproof, surprisingly waterproof.

2) BoutiqueNarelle rain skirt made from PUL waterproof fabric (sourced from a DIY nappy company). Designed to cover ankle-length skirts, its Velcro fastener tabs also make it easy to wear hitched up shorter.


The trial was conducted on a frigid wintery day (forecast high of 10°C). I wore the above waterproof layers over top of a thick knit tunic and tee shirt, fleece jacket, heavy denier stretch jeans, two pairs of socks, and leather ankle boots. When I reached my destination, I was able to shed the parka and skirt to drip at the door and take care of my errand in a dry and comfortable state.

It was a calm, almost windless day, so the skirt remained covering my knees for most of the journey. I think I flipped it back down twice.

My basket cover is made from PUL, the same fabric as the skirt. More commonly used for reusable baby nappies (diapers), I've found it keeps liquid out equally well as keeping liquid in.

I hope you've found something fabulous and inspiring here today.

Fiat lux!
Narelle

Friday, August 2, 2019

Shamrock Dress: Thrifty Tricks for Modest Sporty Women

Low-budget fashion tips to keep you stylish, safe, and covered while active outdoors


Dress Upcycling Technique #1


Modesty Challenge:


What to wear for outdoor cycling and gardening activities? I want modest garments covering me from neck to knees while allowing easy, safe movement, with expectation of getting grubby and sweaty.

Dollar Challenge:


Try not to spend money on it, because my income doesn't include a clothing budget. 🤔😬

My Solutions:


I found a lined cotton voile tunic dress at nearby SaveMart recycled clothing shop. (NZ$8)

It was too tight, too short, too revealing. But I could fix all those.

For improved fit, I cut two button holes centrefront and hand-edged them with buttonhole stitch. I snipped the tight elastic waistband and pulled it out, and replaced this with a longer elastic with cord ties stitched to the ends. I pulled the ties to a comfortable width, and secured with an elegant knot. (Notions sourced from my haberdashery stash.)


Next, I stitched the gaping bodice-front closed, and made it look intentional with a decorative button. (Purpose-bought, about 50 cents.)

I sewed a simple dome-front blouse to wear under the dress, covering back and shoulders and filling in the low neckline. (Cotton voile from my fabric stash.) For cooler temperatures, I can wear layers of long-sleeved knit tops under the dress.


If I had found suitable fabric, I would have lengthened the dress to just below my knees, but I wasn't able to fix this dress in that manner. Instead...

I sewed wide-leg trousers to wear under the dress. (Calico from my fabric stash.) These are perfect for gardening, but the wide cuffs are dangerous on the bike. The legs don't have enough length to clamp around my ankles, so for cycling, I bought a pair of green chinos with close-fitting ankles. ($8 from SaveMart.)


Above are the calico wide-leg pants worn with a different tunic. The outfit got a sartorial upgrade for the photo with floral hat, hair ribbon, and leather sandals. In the garden, I'd be wearing rubber jandals and a sturdy, easy-to-launder hat.

The blue tunic ($8 from SaveMart) might look dainty, but it's been fabulous for gardening. I love that I can look feminine even when I'm sweating in the dirt.

Learning the clothing tricks defined in this post has vastly increased the quantity of secondhand garments that are useful to me. I no longer feel so limited or frustrated by my clothing options.

Look out for more Boutique Narelle posts detailing liberating modest fashion techniques.

Fiat lux!
Narelle

Thursday, May 2, 2019

Your Lifestyle, and Modest Clothing Choices

Your lifestyle strongly impacts the kind of clothing you wear.

Blast from a Long-Hemmed Past

Sample of my 2019 Outdoor Lifestyle

In 2015, my lifestyle changed dramatically. In the space of four months I went from being a clean, intellectual indoors lady to an grubby, active outdoors lady who needed to be able to jump on a bicycle with five minutes' notice. My clothing style had to change to accommodate this.

Upcycling

I didn't have any clothing budget to speak of, so I mostly adapted the dresses I had, with the addition of fabric from my stash and thrifted trousers from SaveMart. In the next few posts I will share some of the upcycled outfits I created to allow me an active outdoor lifestyle and yet still feel like a lady and be modest.

Adapting

I tried very hard to find a way to stay with my ankle-length dresses, but they simply weren't safe when working with tools, moving up and down steps with my hands full, or on the bicycle available to me.

Modest Cucumber, Summer 2019

Modest Cucumber, Summer 2018


I found that ankle-fitting trousers and an A-line dress hemmed just below the knee work best for cycling. Wide-legged trousers and a shirt-dress (tunic) hemmed just above the knee work best when I'm in the garden.

Climbing a steep and slippery hillside...

 ...on a frigid day in the New Zealand bush

Another problem was that my preferred light tints couldn't elegantly sustain exposure to dirty environments. Even my dress-nicely social outing spaces weren't safe.

I remember how heartbroken I was when my ivory cashmere coat warmly embraced a large piece of chocolate cake in my sit-upon area. Not a good look for a well-groomed lady. Nothing I tried would remove the stain. Light-coloured, sensitive fabrics have been retired until my life has more clean places in it.

Touring a Medical Flight Facility

Climbing around in that small space is challenging!

Assessing

I encourage you to assess your individual lifestyle and the activities you're involved with, and have the courage to make clothing choices that are best suited to your preferences AND your needs in those situations.

Don't limit your options to what everybody else wears or says is acceptable or expected. Give yourself space to adapt. (My style transition took a couple of years.) Be creative. Be you.

Fiat lux.
Narelle

Explore your world!

Monday, July 13, 2015

Happy Hattitude: stylish, feminine, and adaptable Fleece Beanie


I made something!

This weekend I started and finished a project.

And TADA! Here it is.

Are you acquainted with this two-fold joy?…the powerful delight in the act of creation, and then the urge to share that delight with someone. I wonder, is this how God felt when he introduced Eve to Adam? …No, I’m sure the ecstasy was far beyond my comprehension, for no-one in the whole wide world had made an Eve before.

My creation isn’t unique. Many others have made hats, and certainly hats in this round-top, beanie style, but I’ve never made a brimless hat before, so I think I’ll call this my Eva Hat. I based it on the free pattern from Fleece Fun*, adding a cotton knit lining, turning up the lining to create a brim, and doubling the ribbon trim to moderate the strong colour block look.

*The Fleece Fun blog and video sewing tutorials show the hat in baby size, but the pdf pattern I downloaded is in adult sizes of small, medium, and large.
The first two images show the hat worn without the threaded ribbon. The fabric flower is a purchased one, from which I pulled out the stem and hot-glued a metal crocodile clip to the back of the flower head. It’s proven to be a wonderfully flexible ornament.
I added the cotton knit lining to the hat for softness, consideration for my curly hair (which doesn’t get on well with polyester fleece), and extra warmth (New Zealand’s winter winds are piercing). It’s been so cold here that I was prompted this week to check I had a hat suitable for sleeping in. The best we had was a tight black wool beanie with a brown kiwi embroidered on the front. Not my idea of comfortable head covering.

But with Eva…yes, it’s Happy Hattitude with Eva.
Do you have a topper that brings on a Happy Hattitude for you and the people who look at you? If not, is it time you provided yourself with one?

As modest Christian women, we can joyfully pursue dressing habits that bless others and signpost our unique personality and royal position.


Fiat lux!
Narelle


Friday, January 3, 2014

Streamline Your Holiday Experience: 2 Simple Packing Tips for Easier Travel

TRAVEL TIPS for modest women
"What should I pack? What will fit in my bag? How much will I need?” Delight at her imminent vacation forgotten, the strain of this holiday horror dragged the lines of her face into a weary pucker.

Sometimes we need a holiday to recover from packing for our holiday. Do you know that feeling? I’ve learned a few tricks that ease this process.

After months of anticipation, my parents and I treated ourselves to 6 days of early summer retreat at a thermal village. We secured the same accommodation we enjoyed on a previous year, so I knew what to expect in the way of facilities, activities, and weather.

Since that holiday, I’ve invested time and energy in wardrobe improvements. This, and knowing what to expect, allowed me to streamline my packing experience.

DRESS TO WEAR
For the road trip, I wore a dress I termed my ‘travelling outfit’, an aqua polyester check that was comfortable, temperature-adaptable, and made me feel pretty for the public part of my journey.

ESSENTIAL DRESSES TO PACK
In my pack, I stowed two sturdy sleeveless dresses (one blue denim, one melon cotton sateen) and enough button-up shirts for a fresh one each day (aqua, blue, rose, and peachy printed voile). The shirts could be worn under or over the dresses. These dresses allowed me to pack the lightest I ever have for a week’s holiday. They’ve been well tested and I knew they would serve.

In fact, they served even better than anticipated. I wore the denim dress four days and one of the shirts for two (cooler) days, leaving the other sleeveless dress fresh and available for the homeward journey.

LESS LAUNDRY
The result was I didn’t have to launder my ‘travelling dress’ ready for the return trip! It would have been a simple task given the easy-care fabric*, but this was the first holiday of this length which didn’t require me to do laundry (other than draping out swimwear and towels to dry) and I liked it.

*Washing would have been done by hand in the kitchen sink, squeezed dry, placed on a coathanger, and hung on a porch line I set up or from the shower curtain rail in the bathroom.

OTHER CLOTHING ESSENTIALS
Other wardrobe pieces included:
two zipped fleece jackets (one thick aqua, one thinner melon red) which could be worn layered on cool, wet days and cold nights;
a light cotton cardigan;
a waterproof skirt (Boutique Narelle design) and jacket (Kathmandu);
closed-toe walking shoes, sturdy sandals for the hot days, warm slippers, jandals (thongs/flip-flips) and swimsuit (custom-made from Simply Modest Swimwear), and a satin kimono for transitions from bathhouse to changing room.

ACCESSORY ART
And finally, my little extravagance, a collection of hats, for sun protection and turning any of my garment combinations into an outfit worthy of a stylish lady on a visit to town. I took three and wore two, the bone baker boy cap for travelling, the wide-brimmed aqua cotton for outdoor adventures and playtime with the children and excursions to town.

That week’s weather, and I being familiar with the environs, meant the felt Akubra, whose stiff shape requires it to travel independent of my pack, wasn’t needed on this occasion. I like a stiff hat on windy days (which are very common in New Zealand), because wide-brimmed cotton hats, even starched ones, engage in perpetual argument with the air currents, to the detriment of the wearer’s vision and composure.

On the two days when rain bucketed down without ceasing, I went walking clad in sandals (quicker to dry than shoes) and hooded rain gear, minus spectacles. I may have seen less detail of my surroundings, but it meant I didn’t need a hat visor to keep my external eyes dry. Nevertheless, I’m glad I had the Akubra available in case of need.

PACK TO SUIT YOUR SUITCASE
I took photos of what I packed for the last trip to this spot, and comparing them with this trip, I see that I made progress in shrugging off the holiday horrors that accompany the challenge of what to put in that suitcase.

So how can you streamline your packing experience? Try these two things that make a difference for me:
  • Find out what to expect.
  • Invest time and energy preparing for it.
Once you’ve established a system, the process will be even smoother next time. 

Bon Voyage!
Narelle
What tricks have you learned that make packing and travelling easier for you? Share with us in the comments box below.

Note: We are sorry about the missing images. They were tragically and irreversibly gobbled by Google+.

Friday, May 23, 2008

When Skirts are Too Cold, Part I

When chill airs and wintry winds get close and friendly, is it possible to wear skirts and be cosy? I've heard many say it isn't, but I know otherwise.

Are you ready to receive impowering information?
How to be warm in a skirt:

  1. Wear layers underneath. Undercover solutions discussed below.
  1. Line the skirt. Illustrated directions on how to do this coming soon.
  1. Wear boots.


Introducing Damart

The heart of the Damart story is a unique fabric called Thermolactyl, which provides lightweight insulation against the worst of weathers. A classy, modern 'long-john' provider, the company is very sport oriented, with a number of sponsorship affiliations, keeping fit young sportsmen warm during the the winter and helping prevent muscle injuries.

The ability of Damart underclothes to provide the best thermal environment whilst still keeping the body dry and able to function normally has meant that Damart has travelled successfully to all corners of the earth and up some of its highest mountains.

But what does this have to do with attractive, feminine modesty?

It's not only the old who feel the cold. Lightweight but wonderfully cosy, a thermal under-layer makes a world of difference to what you can do (or wear) when it's cold! For instance, you can comfortably wear that pretty dress or blouse considered more appropriate to autumn than winter. Long-johns under trousers prevent the frozen thigh syndrome that frigid winds invite so readily. They form a happy temperature arbitration when sitting on cold stone steps.

Notice the different Thermolactyl grades.

The undercover range is dainty and colourful, but there's also a delightful range of outer clothing, some of it incorporating the famous Thermolactyl or a new blend of Thermolactyl and silk. Damart supplies a wide range of sizes and colours, and comfortable shop-from-home features. I have noticed that the website takes a while to display the latest catalogues, so if you want up-to-date product and sales information, go for the mailed version rather than the website.

Browse Damart here:
Damart New Zealand
Damart Australia

Overseas outlets include:
www.damartusa.com
www.damart.co.uk

If you prefer to see before you buy, use the website's Store Finder feature.