Friday, April 3, 2020
Aqua Splash: Smart Fashion Tricks for Modest Women on a Budget
How not to wave goodbye to a favourite skirt that no longer fits
So you've put on weight and your favourite ankle-length skirt no longer fits? You feel like you should give it away, but you love it soooo much. I know how you feel.
Assuming that the fabric is still in reasonable condition, this post details a way to alter it so you can continue wearing your favourite skirt.
My skirt was already lined, in a soft dobby cotton that is part of what makes it so blissful to wear. If your skirt is not lined, you can create a lining in the same shape as your skirt, which will make it super quick to create neckline and armholes. Alternatively, you can hem them or use bias binding.
Unpick any elastic or band at the skirt waist, preserving as much fabric length as you can. Press the waist seam open.
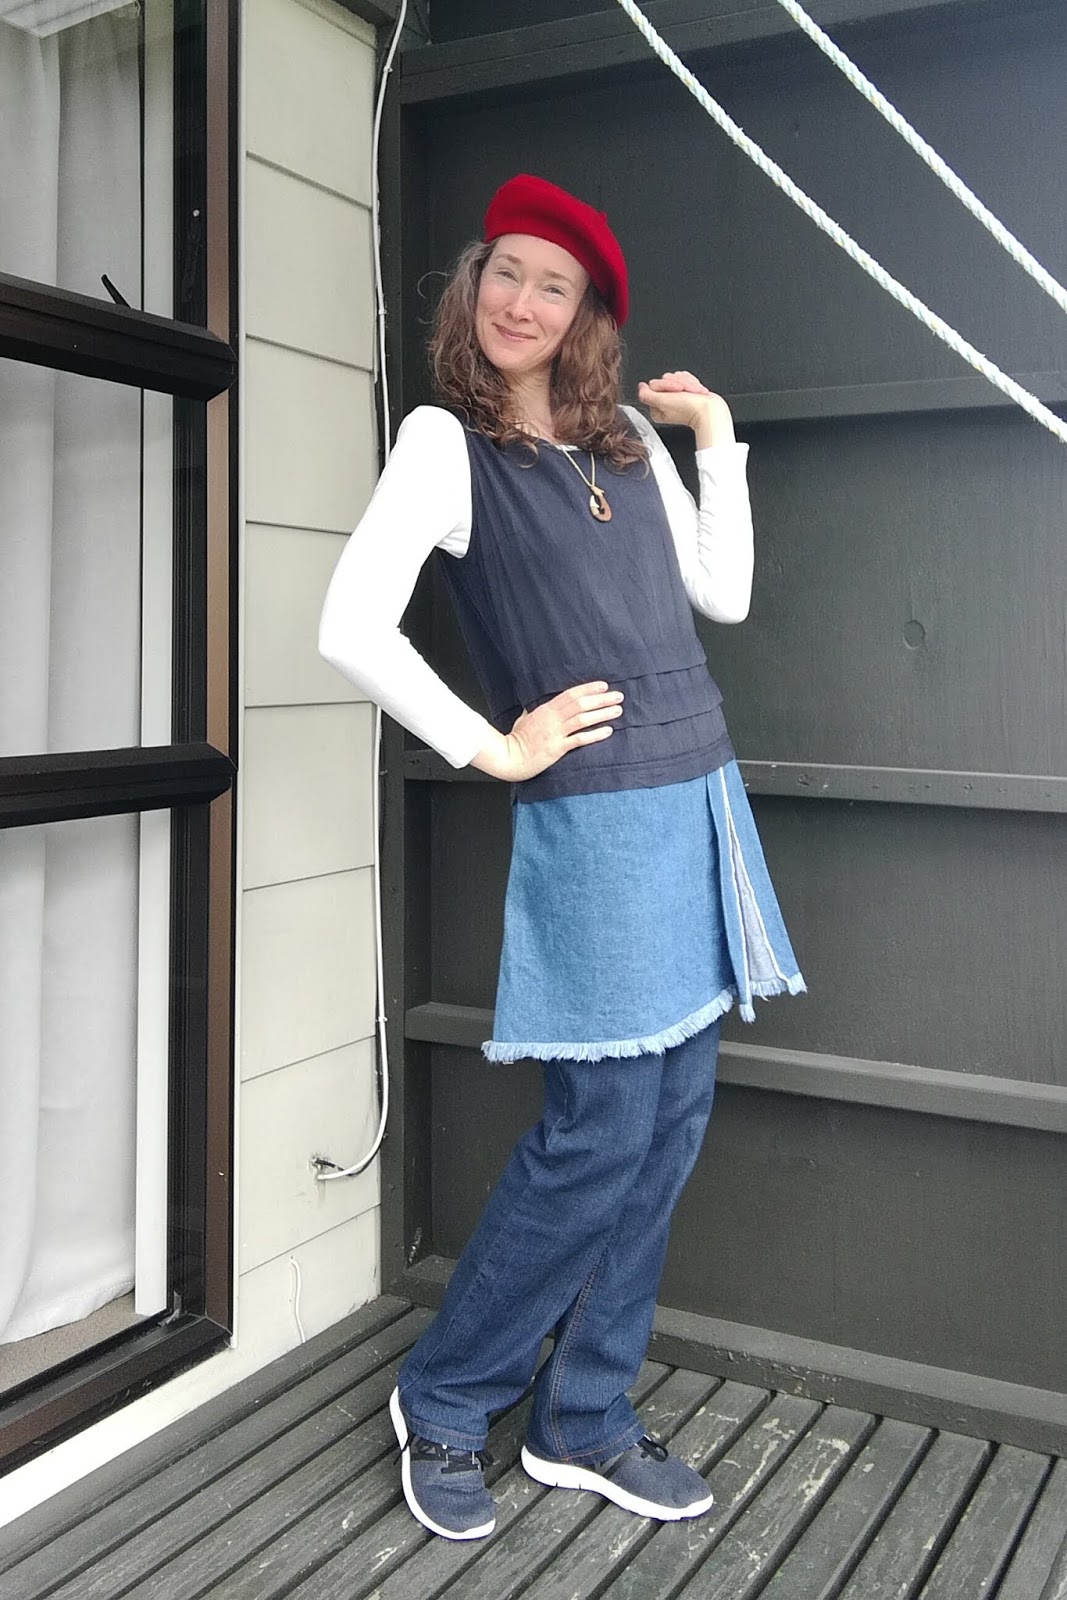
Check that the skirt is roomy enough for the skirt waist to fit over your shoulders. The easiest way to do this is to lay the skirt over top of a sleeveless dress or tank top that already fits you. If you want to utilize the full length of the skirt, the skirt waist seam will become your shoulder seams.
If the skirt is not wide enough, but it does fit under your arms, use the Skirt Upcycling Techniques (detailed in Boutique Narelle posts listed under the Frugalista Dressmaking tag) that turn a skirt into a yoked dress.
If it is too wide for your shoulders, you'll need to cut it to fit your shoulders and realign the side seams to fit under your arms.
Before you cut, decide if the neck opening is going to be big enough to pull over your head. If you want a closer fitting neckline, you'll need to insert a zipper at the back or front. If the skirt already has a zipper, you may need to lower it to match where your new neckline will sit. I had plenty of width so I removed the zipper entirely and stitched up the seam.
Using pins to replicate the fit of your sample dress or tank top, mark on the skirt where you want the neckline and the armholes, making sure there is sufficient seam allowance.
Cut out the shape of the neckline and armholes, extract the lining, and sew the shoulder seams on the dress and lining separately.
If you don't have a lining, bind or hem the neck and armholes, press, and you're done.
If you do have a lining, reinsert the lining (ensure right sides together) and sew around the neckline and armholes. Clip the curves and trim the seam allowance. Understitch the seams to help them sit flat. Turn the garment right side out. Finish off by pressing the seams.
My skirt had a lot of fullness which created a lot of bulk between the armholes at the back. I cinched this fullness by sewing D-ring loops with ribbons attached for a pretty and easy way to create shape at the waist.
Now you know a nifty trick for upcycling a secondhand skirt into a new and gorgeous dress for very little cost.
Look out for more Boutique Narelle posts detailing liberating modest fashion techniques.
Fiat lux!
Narelle
Labels:
Frugalista Dressmaking,
Modelling Modesty,
Thrifting
Friday, March 6, 2020
Yoked Tunic Dress in Denim: Smart Fashion Tricks for Modest Women on a Budget
Have you ever been in that desperate state where you wail, "HELP! I need a new dress, it's got to be modest, and I only have a few dollars to spend on it!!!"
Clothing availability, coverage, and cost are factors that often bring a modest-hearted woman to feelings of desperation. I had an urgent need for a warm modest dress. Here's what got me out of that desperate place.
Skirt Upcycling Technique #3:
Yoked Tunic Dress Revisited in Denim
A few months prior, I had come up with a new technique, turning a skirt into a tunic dress by setting the skirt's waist under the armpits and sewing a bodice yoke to the skirt waist band. It worked the first time, so I decided to try it again.
This denim skirt is onto its second upcycle. The first round (pictured above), I removed the elastic waistband and sewed the skirt onto a knit tank top. For the second round, I unpicked the tank top from the skirt, and prepared a bodice yoke to fit to the skirt, turning it into a tunic dress.
Finding a fabric match for the denim was the first challenge. The only piece in my fabric stash that worked was a navy polycotton which would be great for the yoke lining.
I went hunting at nearby SaveMart recycled clothing store and compared a collection of wide scarves. I took a risk with a loosely woven viscose because the colours went so perfectly with the tones in the denim. At $10, it wasn't cheap, but having seen the denim and viscose together, it was 😍 and I really, really wanted to keep them together.
The loose weave and delicate nature of the viscose scarf (featuring the word PARIS and a picture of the Eiffel Tower) were in stark contrast to the sturdy and durable denim. I improved the viscose stoutness by adhering a thick iron-on interfacing to it and careful edge-stitching to hold the threads in place and reduce wear to the seam allowance while I worked. The yoke lining was given a lighter interfacing, and the two yoke layers were top-stitched to give added support to the still-mobile viscose threads.
The risk and effort have been worthwhile. Wearing this yoked tunic dress makes me feel warm, comfortable, feminine, modest, and classy. It has earned a number of approving comments, so I know that other people are enjoying it too.
Now you know a fabulous trick for upcycling a secondhand skirt into a new and gorgeous dress for very little cost.
Look out for more Boutique Narelle posts detailing liberating modest fashion techniques.
Fiat lux!
Narelle
Narelle
Labels:
Frugalista Dressmaking,
Hair,
Modelling Modesty,
Thrifting
Friday, February 7, 2020
Blue Tank to Tunic Dress: Smart Fashion Tricks for Modest Women on a Budget
Tank Upcycling Technique #1:
Turn a Tank Top into a Tunic Dress
Thrifty Tricks for Modest Sporty Women:
Low-budget fashion tips to keep you stylish, safe, and covered while active outdoors
The Design Challenge
Early in my exploring of ways to cheaply and quickly add classy options to my activewear, I discovered the technique of adding a skirt to a sleeveless top or tank.
This tunic with faux kick pleat was my first trial of that concept. I was just starting to cycle, so garment length and hem width were also experimental. My goal was a knee-length tunic. Keep reading to find out why I didn't achieve that.
The shaped tank top, bought secondhand at nearby SaveMart for about $5, is viscose, soft, drapey, and durable. The fit is excellent -- loose without looking like a sack.
I had a strip of cotton denim that was a good colour match. Basing the skirt design on an adorable dress with contrast kickpleats that my mother had been sewing for her granddaughters, I found a way to recreate the look with the limited fabric I had available.
I folded the selvedges to create an attractive horizontal border that showed off the rightside/wrongside contrast of the denim, and used bias binding to join the panels and add further impact. To hem, I sewed a zigzag stitch 15mm above the raw skirt hem then pulled out the horizontal threads as far up as the stitching, creating a fringe.
My next step was to sew the tank and skirt together. At this point I found that the top ratio greatly outweighed the skirt ratio, and the weight of the denim created unsightly ripples in the viscose where the seam sat level with my crotch. So I created big tuck pleats in the tank until the bottom-to-top ratio looked balanced and the problem seam had enough support for the weight.
This outfit has been great for cycling to the post shop, clambering on rocks, harvesting seaweed, gardening, bush walks, and relaxing at an urban barbecue. I feel smart, modest, and feminine, while also knowing my limbs have the freedom of movement demanded by my activities.
This viscose/denim combination is easy wash-and-wear. The only aspect other than a bit more length that I'd want to change is creating more hem width, because the stress where the pleat flaps join has been more than the fabric and stitching could well sustain (see seruptitious repairs in photo of garment interior).
I originally paired the tunic with wide-leg Tencel jeans, but I've grown out of them. Wide-leg trousers are hard to come by at present, so I'm modelling this outfit with stovepipe jeans.
Now you know a fabulous trick for upcycling a secondhand tank top into a new and classy dress for very little cost.
Look out for more Boutique Narelle posts detailing liberating modest fashion techniques.
Fiat lux!
Narelle
Narelle
Labels:
Frugalista Dressmaking,
Modelling Modesty,
Thrifting
Friday, January 3, 2020
The Two-Shirt Dress: Smart Fashion Tricks for Modest Women on a Budget
Shirt Upcycling Technique #1
Cost Challenge
When you don't have funds readily available to buy clothes, you're always looking for ways to give yourself new clothes without spending money on them. When I discovered the following frugalista dressmaking technique, it opened to me an exciting world of fresh opportunities within my existing wardrobe.
Here are the items I started with. I had two favourite shirts that I could no longer wear because my biceps and wrists had increased in size (a novel problem for me). The shirts were still in good condition. I loved their fabric. Hated the thought of parting with them.
Inspiration suddenly bubbled when I realized they shared the same colour palette. I pulled out my unpicking tool (Quick Unpick) and carefully got to work.
Creative Challenge
Is there enough fabric in two shirts to make one modest dress?
I removed the long sleeves from one shirt and opened up the long arm seams. I used bias binding from my stash to neaten the armholes on the now-sleeveless shirt.
I removed the short sleeves and collar from the other shirt, and dismantled it at the shoulders and side seams.
Now to rearrange the parts, trim them to size, and put the jigsaw together. The trickiest part for me was lining up those two shirt pieces with the long sleeves and deciding how to get the most length out of them for the skirt. I used a coordinating crepe fabric from my stash to add fullness.
When I'd stitched the skirt pieces to each other in a circle, I gathered the top edge and joined it to the hem of the sleeveless shirt.
It's so much fun showing people my two-shirt tunic dress.
It always makes them smile. It makes me smile too. It's become one of my favourite dresses. I didn't have to lose something I loved. Instead, I gained something special by upcycling it into usefulness again.
Learning the clothing tricks defined in this post has vastly increased the quantity of secondhand garments that are useful to me. I no longer feel so limited or frustrated by my clothing options.
Look out for more Boutique Narelle posts detailing frugalista dressmaking and liberating modest fashion techniques.
Fiat lux!
Narelle
Narelle
Labels:
Frugalista Dressmaking,
Modelling Modesty,
Thrifting
Subscribe to:
Posts (Atom)